1.b4 Na6
Once b4 is played by white black has an opportunity to play Na6 as he may find the knight better placed on c5 square. This is similar to the Alekhine defense where the knight is and can be pushed around repeatedly from one square to another. The provoking of pawn moves create a lot of open area for the opponent to attack your king.
Hence the knight on a6 provokes the pawn moves and the pawn move provocation can be seen in the below game:
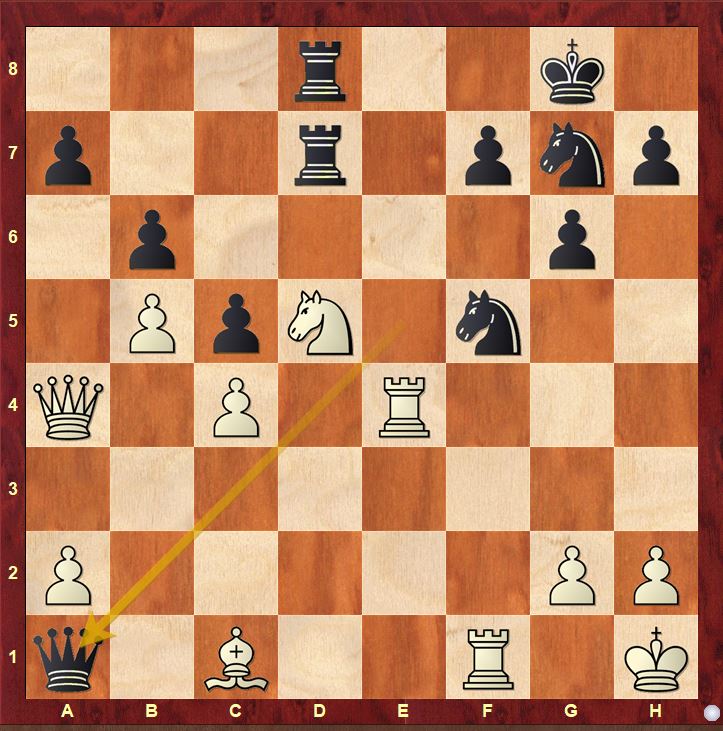
1.b4 Na6 2.b5 Nc5 3.d4 Ne6 4.e4 c5 5.d5 Nc7 6.c4 d6 7.Bd3 e5 8.dxe6 Nxe6 9.Bb2 Be7 10.Nc3 Bf6 11.Nge2 Ne7 12.0-0 Nd4 13.Nf4 g6 14.Kh1 Ne6 15.Nfe2 0-0 16.f4 Ng7 17.e5 dxe5 18.Ne4 Nef5 19.Nxf6+ Qxf6 20.fxe5 Qh4 21.Rf3 Be6 22.Qc2 Rfd8 23.Be4 Rd7 24.Raf1 Rad8 25.Bc1 b6 26.Rf4 Qe7 27.Qa4 Nd4 28.Nc3 Bf5 29.Bxf5 Ndxf5 30.Nd5 Qxe5 31.Re4 Qa1
Black tries to hold on to the f6 square from the knight fork.
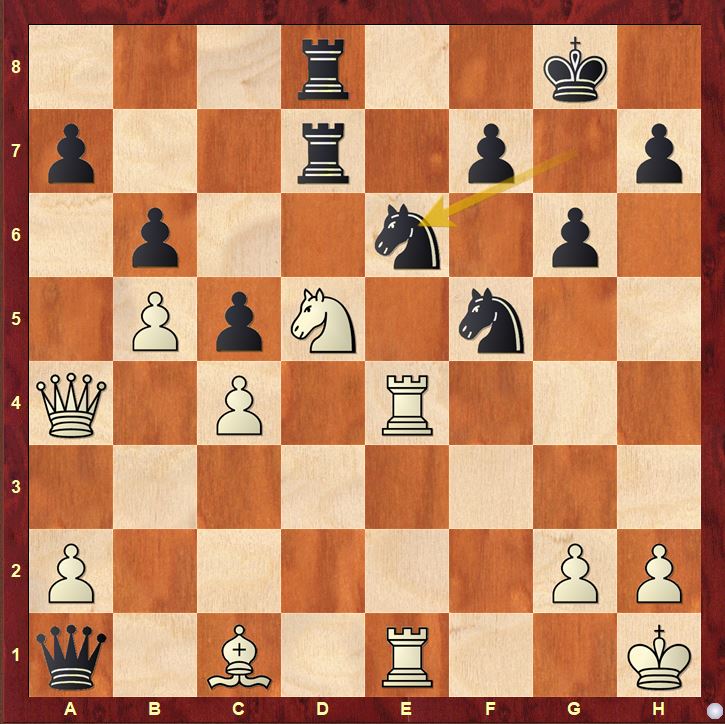
32.Rfe1 Ne6
Another critical moment when the queen gets trapped for bishop and rook in the next move
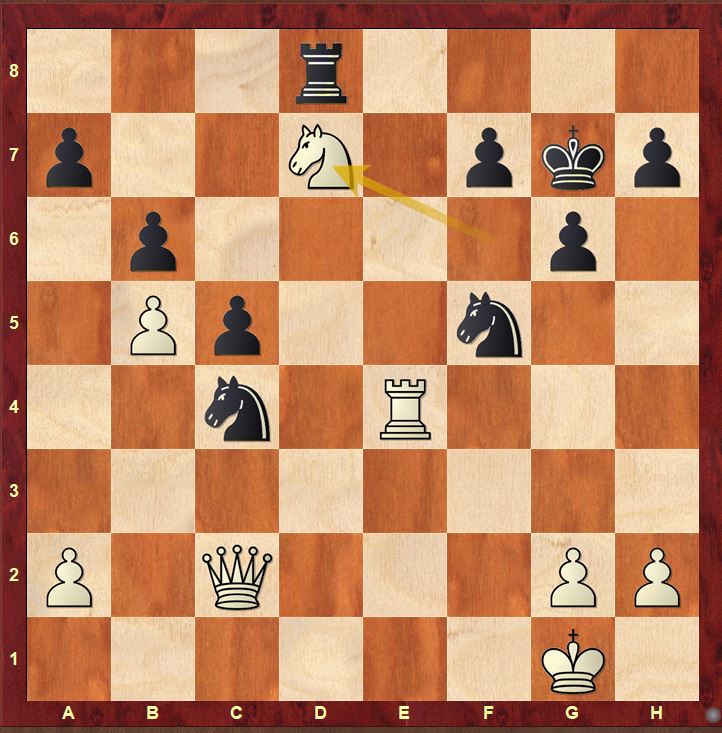
33.Bg5 Nxg5 34.Rxa1 Nxe4 35.Re1 Nf2+ 36.Kg1 Nd3 37.Re4 Nb2 38.Qc2 Nxc4 39.Nf6+ Kg7 40.Nxd7
Bucker Defense involves white chasing the black knight around so any slight mistake with playing such complex positions might be uncomfortable for white. If black succeeds in playing around the game positionally black might be able to just hold along with the position.


Comments